
Ultrasonic cleaners make it simple to clean items that are tough to scrub by hand. These machines use sound waves to create tiny bubbles in a cleaning solution, which lift away dirt, grease, and buildup from surfaces. To use an ultrasonic cleaner effectively, it’s important to choose the right solution, set the correct time and temperature, and place items properly in the tank.
Whether cleaning jewelry, tools, or delicate equipment, the process works best when the machine is used correctly. Larger units, such as a 30L ultrasonic cleaner, can handle multiple or bigger items at once, making them useful for both personal and professional use. Regular maintenance of the tank and careful handling of items also play a key role in getting consistent results.
By understanding how to set up the cleaner, what solutions to use, and how to maintain the unit, anyone can achieve better cleaning performance with less effort. This approach reduces wear on the machine and helps items come out looking their best every time.
Key Takeaways
- Proper setup and solution choice give the best results
- Correct use of time, temperature, and placement improves cleaning
- Regular maintenance keeps the machine working well
Key Steps for Using an Ultrasonic Cleaner Effectively
An ultrasonic cleaner works best when the user understands the cleaning process, prepares the right solution, arranges items correctly, and adjusts the machine’s settings with care. Each step affects how well contaminants are removed and how long the equipment and items last.
Understanding How Ultrasonic Cleaning Works
Ultrasonic cleaning uses high-frequency sound waves to create microscopic bubbles in a liquid. This process, called cavitation, causes the bubbles to collapse and release energy that loosens dirt, oils, and other residues from surfaces.
The bubbles can reach small crevices that brushes or cloths cannot. This makes ultrasonic cleaners useful for items with complex shapes, such as jewelry, tools, and medical devices.
The cleaning tank holds the liquid, while transducers attached to the tank convert electrical energy into ultrasonic waves. The effectiveness depends on frequency settings, cleaning time, and the solution used. Lower frequencies produce larger bubbles for heavy soil, while higher frequencies target delicate surfaces.
Selecting and Preparing the Cleaning Solution
The choice of ultrasonic cleaning solution affects how well contaminants are removed. Many users mix distilled water or deionized water with a mild detergent. For grease or carbon buildup, specialized solvents may be required.
The solution should reduce surface tension so cavitation can reach all surfaces. If the liquid is not properly mixed, cleaning performance decreases.
Heating the solution often improves results. Warm liquid dissolves oils faster and speeds up cavitation. However, temperatures should not be too high, as this can damage sensitive items or reduce bubble activity. Always check the item’s material before applying heat.
Proper Loading and Arrangement of Items
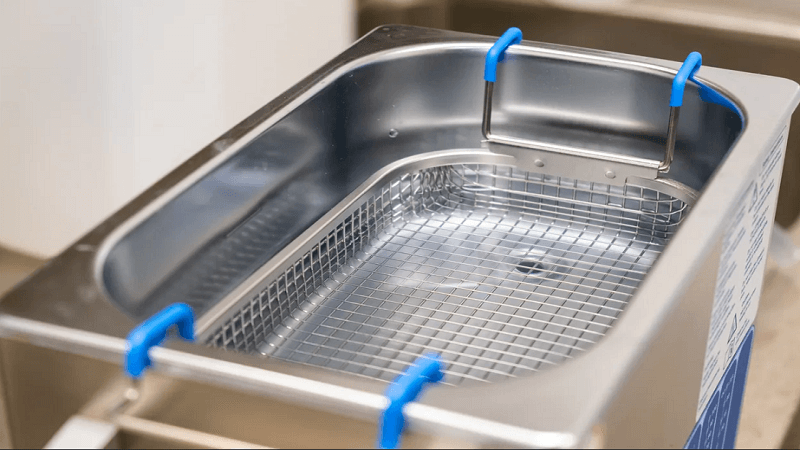
Items should not rest directly on the bottom of the tank. Most ultrasonic cleaners include a basket or tray to hold objects above the transducers. This prevents scratching and allows ultrasonic waves to move freely.
Objects should be spaced apart so bubbles can reach all surfaces. Overloading the basket reduces cleaning efficiency because the waves cannot circulate evenly.
For small or delicate items, placing them in glass beakers filled with solution inside the tank can protect them while still exposing them to cavitation. This method also allows different solutions to be used at once without mixing.
Setting Time, Frequency, and Temperature Controls
The effectiveness of ultrasonic cleaning depends on the right time, frequency, and temperature settings. Short cleaning cycles may not remove all debris, while long cycles can damage delicate parts. Most items clean well within 5–20 minutes.
Frequency settings should match the type of item. Lower frequencies (around 25–30 kHz) remove heavy dirt, while higher frequencies (above 40 kHz) suit fine or fragile surfaces.
Temperature control also matters. Many ultrasonic cleaners, such as a 30L ultrasonic cleaner, include heaters to keep the solution warm. A range of 40–60°C is often effective for most applications, but delicate materials may require cooler settings.
Regularly monitoring and adjusting these settings helps maintain consistent cleaning results without unnecessary wear on the items or the equipment.
Maximizing Cleaning Effectiveness and Maintenance
An ultrasonic cleaner works best when the right solution, settings, and care are applied. Proper use not only improves cleaning efficiency but also extends the life of the machine and keeps items safe from damage.
Optimizing Cleaning Efficiency
Cleaning effectiveness depends on several factors, including frequency, temperature, and cleaning cycle length. Lower frequencies (around 25–40 kHz) handle heavy dirt on metal parts, while higher frequencies (above 60 kHz) suit delicate items like jewelry or medical tools.
The cleaning tank should be filled with the correct solution. Plain water is often less effective, while a mild detergent designed for ultrasonic cleaners improves results. The solution should cover the items fully but not overflow the tank.
It is best to pre-rinse items to remove loose dirt before placing them in the tank. This reduces strain on the transducers and allows the ultrasonic waves to work more effectively.
Shorter cleaning cycles are usually better than long ones. Running multiple short cycles prevents overheating and avoids unnecessary wear on the machine.
Best Practices and Common Mistakes to Avoid
Items should never touch the bottom of the cleaning tank. Using a basket or tray keeps them off the transducers and prevents scratching.
Avoid mixing very different materials in one cycle. For example, cleaning steel parts and soft gemstones together can lead to damage. Grouping items by type helps maintain cleaning effectiveness.
Do not overload the tank. Crowding reduces the reach of ultrasonic waves and lowers cleaning efficiency. Each item needs space for the cavitation process to work properly.
A common mistake is using the wrong solution. Harsh chemicals can damage both the items and the ultrasonic cleaner. Always use solutions made for ultrasonic cleaning and replace them when they become dirty or cloudy.
Maintenance and Post-Cleaning Care
Regular maintenance keeps ultrasonic cleaners working at full capacity. The cleaning tank should be drained and wiped after each use to prevent buildup of residue.
Transducers should not be exposed to an empty tank. Running the machine without liquid can cause permanent damage. Always check fluid levels before starting a cleaning cycle.
Inspect cords, switches, and the tank surface for signs of wear. Small cracks or leaks can reduce cleaning effectiveness and shorten the life of the unit.
After cleaning, rinse items with clean water and dry them thoroughly. This removes any leftover solution and prevents spotting or corrosion. Proper storage of both the items and the machine supports consistent performance.
Conclusion
Using an ultrasonic cleaner effectively comes down to a few simple steps: choosing the right cleaning solution, setting the proper time and temperature, and keeping the unit well maintained.
When items are placed correctly and the machine is not overloaded, the cleaning process works more evenly and removes dirt more thoroughly. Regular care of the tank and solution also helps keep results consistent.
By following these practices, users can clean delicate or detailed items with less effort and achieve dependable results across different applications.