
Concrete finishing transforms basic concrete pours into durable, smooth, and attractive surfaces. Whether you are a homeowner tackling your first DIY patio or a long-time contractor, there are tested tips and proven strategies to produce quality finishes under any circumstances. From concrete finishing techniques for the novice to advanced tricks used by experienced pros, mastering this craft requires knowledge and patience.
The right approach to finishing helps prevent common problems like cracking, dusting, and uneven coloring. It is essential to tailor your method to factors such as weather, the type of project, and the specific appearance or function you want from the finished surface. By following the trusted advice below, anyone can create concrete work that stands the test of time.
Preparation remains the foundation of every successful concrete job. Skipping crucial steps or cutting corners can lead to costly repairs and frustrating do-overs. A well-prepared site and setup, coordinated mixing, and the right sequence of finishing actions all influence the final product significantly. Understanding these steps is the first requirement for anyone aiming to achieve a truly professional result.
Start with Proper Preparation
Getting your site ready is the first and most important step in the concrete finishing process, often called prepping your site for delivery. This means removing debris, grass, roots, and rocks so the surface is level and firm. Proper forms must be installed to create clean edges and contain the concrete until it sets. Never overlook the need for control joints; they reduce random cracking by providing planned weak points for the concrete to contract and expand with changes in temperature. A clean workspace and stable forms result in a slab that will last for years to come.
Master the Mixing Process
Achieving the ideal consistency when mixing concrete is key to durability and workability. Too much water weakens the finished product, while too little can prevent the mix from properly filling the forms and bonding. The goal is consistency that holds its shape but remains workable, like thick oatmeal. Accurately measuring water and cement ingredients and thoroughly mixing them to avoid lumps and air pockets helps ensure strength and longevity.
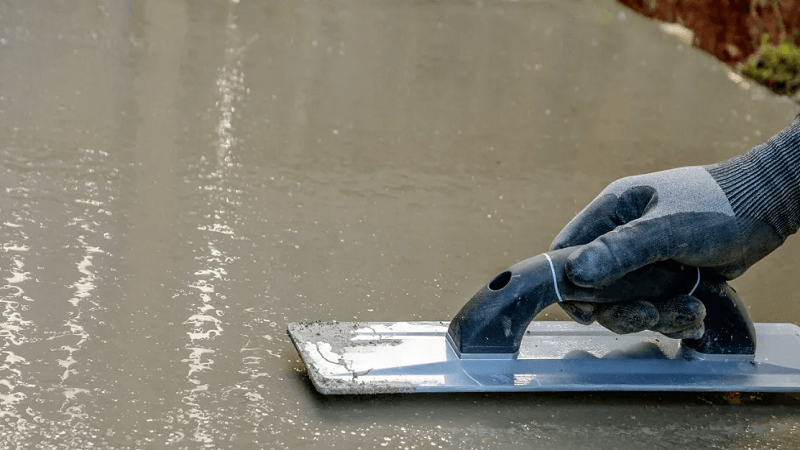
Choose the Right Tools
Investing in reliable tools is a long-term benefit for any finisher. At a minimum, every kit should include a screed for leveling, a bull float for smoothing the surface, finishing trowels for refining edges, and edgers for beveled lines. Using high-quality tools tailored to the job provides a smoother final surface and makes each finishing stage easier and more efficient. For decorative finishes, additional tools like stamps or rollers may also be required.
Timing is Everything
Proper timing is critical at every stage of the finishing process. After the concrete is poured, allow it to settle and bleed off excess water before starting to finish. Beginning too early can lead to surface defects and a weak finish, while waiting too long can make the surface difficult or even impossible to work with. Monitoring the temperature and humidity, and performing a simple thumbprint test on the slab, can help gauge the ideal moment for each step. Mastering timing leads to fewer surface imperfections and greater overall integrity.
Implement Effective Finishing Techniques
The finishing method should match the function and look you want to achieve. A broom finish is great for outdoor walkways and driveways due to its slip resistance, while stamping and staining can deliver eye-catching, decorative surfaces that mimic natural stone or even tile. In every case, consistency in technique, such as overlapping broom strokes or evenly applied stamps, prevents obvious flaws and helps ensure the finish wears evenly over time.
Avoid Common Mistakes
Two of the most frequent causes of concrete failure are overworking the surface and omitting properly planned control joints. Overworking can draw too much water and fine material to the top, weakening the finish and increasing the chance of cracks and dusting. Incorrect or missing control joints can cause unpredictable cracks, reducing both the strength and appearance of the slab. Following best practices at each step helps avoid these and other costly errors.
Prioritize Proper Curing
Curing is a crucial step that greatly impacts the strength and durability of your finished slab. Maintaining sufficient moisture for at least several days after the pour allows the concrete to reach maximum strength. Methods such as covering the surface with wet burlap or plastic sheeting, or regularly misting with water, are typically used to slow the drying process. Rushing through the curing step can cause cracks, curling, and surface dusting.
Apply a Protective Sealer
After proper curing, applying a high-quality sealer extends your project’s lifespan by making the surface resistant to stains, moisture, and freeze-thaw cycles. Sealers are available in both matte and glossy finishes and should be selected based on the slab’s intended use. Regular resealing on exterior surfaces is recommended for lasting protection, especially in harsh or high-traffic environments.
Final Thoughts
By following these proven steps, anyone can achieve professional-quality results in concrete finishing. With careful planning, quality materials, and attention to detail, even novices can produce durable, attractive surfaces that provide many years of trouble-free use.