
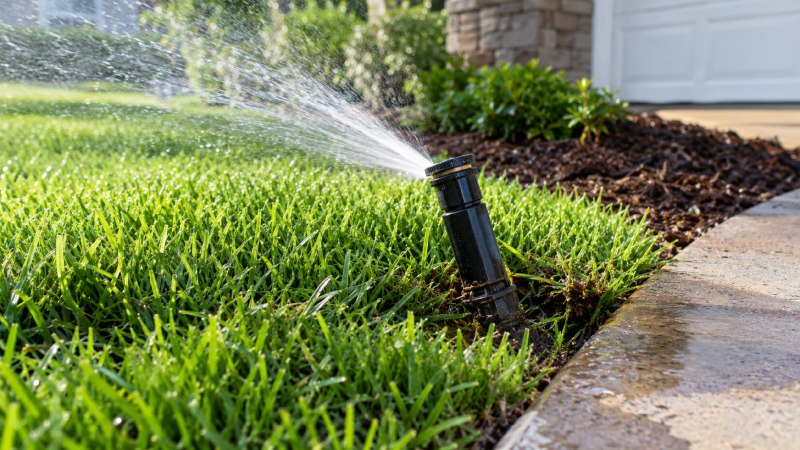
A sprinkler head that sits slightly crooked may not seem like much of a problem until the irrigation comes on and part of the spray lands on the sidewalk. Another head may slowly disappear into the lawn until grass interferes with the spray. Near a driveway, a sprinkler that worked normally for years can start wobbling after repeated contact with a mower, foot traffic, or other activity around the yard.
These problems often look simple from above, but the visible sprinkler is only one part of the installation. Soil settlement, changing lawn height, physical damage, loose connections, cracked risers, leaks, and pressure problems can produce similar symptoms. Pushing a head upright may solve the problem when the soil has shifted. It accomplishes very little if a fitting underneath is cracked.
Before changing anything, run the irrigation and watch the problem area. Then turn the system off and inspect it again. How the sprinkler behaves under pressure, where it moves, and what the surrounding soil looks like can narrow down the problem considerably.
Start With What the Sprinkler Is Doing
You do not need to understand the entire irrigation system before investigating a crooked sprinkler. Start with the visible symptom and compare it with what the rest of the zone is doing.
| What You Notice | Check First | What It Could Mean |
| Head leans but still sprays | Soil and support around the body | Loose soil, settlement, physical disturbance |
| Head sits below surrounding grass | Finished grade and turf growth | Soil buildup, thick turf, settlement |
| Head wobbles when touched | Point where movement begins | Poor support, loose riser, damaged fitting |
| Water bubbles around the base | Connection below grade | Leak, cracked riser, damaged fitting |
| One head will not rise fully | Head and immediate area | Debris, damage, obstruction |
| Several heads on the zone are weak | Zone as a whole | Pressure or flow problem, leak |
| The same head repeatedly gets knocked crooked | Surrounding activity | Mower contact, foot traffic, poor height or placement |
| Spray becomes unusually misty across several heads | Water pressure | Pressure may be too high |
These are starting points rather than firm diagnoses. A leaking connection can loosen the soil and cause a sprinkler to lean, for example, so two symptoms may come from the same problem.
Looking at the entire zone helps. One malfunctioning sprinkler usually points you toward that sprinkler and its immediate connection. Several heads changing at the same time give you a reason to look farther into the system.
Why Did the Head Move?
A sprinkler can continue operating while noticeably tilted. What changes is where the water goes.
A spray that once covered the lawn evenly may begin hitting pavement, a fence, nearby plants, or another area that does not need irrigation. At the same time, part of the intended watering area receives less. The US Environmental Protection Agency recommends checking irrigation systems for tilted heads and other problems that can direct water away from the intended landscape.
If the sprinkler still operates normally, inspect the ground around it. Landscaping work may have disturbed the soil. Repeated foot traffic can loosen the area around a head near a walkway. Very wet soil may offer less support than it once did. A recent repair may also have left soil around the sprinkler insufficiently compacted.
With the system off, gently check the assembly. You are trying to learn where the movement begins, not how far you can bend the sprinkler.
If the head, riser, and nearby soil seem to shift together, support around the assembly may be the issue. If the soil remains fairly stable while the sprinkler rocks from a particular point underneath, inspect the connection before packing additional soil around it.
Resistance is another useful clue. A sprinkler that does not want to move should not be forced upright against the connected pipe or fitting. Exposing enough of the connection to see what is holding it at an angle is safer than using the sprinkler as a lever.
When Grass Starts Blocking the Spray
Sometimes the sprinkler has not moved much at all. The landscape has changed around it.
Grass becomes denser, thatch develops, soil accumulates, and new sod or topsoil can change the finished grade. A sprinkler that originally sat at a suitable elevation may eventually become surrounded by enough vegetation that its spray no longer clears the lawn.
This often shows up as poor coverage close to the head. Water hits surrounding grass instead of traveling its intended distance, leaving the immediate area wet while another part of the zone begins drying out.
Increasing the irrigation time is a poor first response. The other sprinklers continue running longer too, potentially applying unnecessary water while the buried head remains obstructed.
Clear enough vegetation to see where the sprinkler body sits relative to the soil. If turf growth is simply crowding the head, restoring clearance may be sufficient. If the entire assembly has settled, inspect underneath before deciding that a taller connection is needed.
Height also affects vulnerability. A sprinkler raised unnecessarily high can become easier to strike with a mower, string trimmer, wheel, foot, or other landscape equipment. The head needs enough clearance to operate properly without sitting higher than the installation requires.
Not Every Sprinkler Is Supported the Same Way
The word “sprinkler” covers several types of irrigation hardware, and that matters when investigating movement.
A pop up spray head normally sits close to grade and extends when the zone operates. Rotors also rise during operation but distribute water differently and are often used for larger areas. Shrub risers and other fixed risers may hold an emitter above the soil permanently. Micro sprinklers and jets can use smaller risers or stakes within planting areas.
A pop up body sinking into turf therefore presents a different problem from an above ground jet leaning in loose soil.
This becomes especially relevant when physical support is involved. Small rigid risers may sometimes need stabilization to remain upright. NDS Pro, for example, lists steel stakes for risers, including a galvanized steel stabilizer stake intended for rigid riser jet assemblies. The company also offers other stake arrangements for tubing and elevated irrigation components.
A support product should match the type of irrigation component it was designed to stabilize. Adding support to the visible portion of an assembly does not repair a cracked connection underneath it.
Wet Soil Around the Base Is a Different Clue
A leaning sprinkler surrounded by unusually wet soil deserves a closer inspection than one that is simply crooked.
Surface water can come from overspray or soil that absorbs water slowly. Persistent bubbling, erosion around the base, or a patch that remains unusually wet between irrigation cycles can point toward a leak below grade. EPA WaterSense notes that leaks can occur at joints between sprinklers and piping and recommends checking for pooling that may indicate an underground problem.
Watch the sprinkler while the zone is operating. If water appears to be coming from below the head instead of landing there from the spray, shut the zone off before disturbing the assembly.
Careful excavation may reveal a cracked riser, damaged fitting, loose threaded connection, or another problem underneath. Avoid pulling aggressively on the head to gain access because plastic components can be damaged further by sideways force.
A leak can also create the leaning problem that first caught your attention. Escaping water loosens the surrounding soil, the assembly loses support, and the sprinkler gradually moves. Packing fresh soil around it may hold the head upright for a while, but the wet ground will return until the leak is repaired.
One Weak Head or a Weak Zone?
Poor sprinkler performance becomes easier to understand when you compare one head with the others operating at the same time.
Suppose one pop up sprinkler barely rises while every neighboring head works normally. Start locally. Grass may be obstructing it, debris may be interfering with movement, the head itself may be damaged, or there may be a problem at its immediate connection.
Now suppose six sprinklers on the same zone suddenly struggle to rise or reach their usual distance. Six simultaneous sprinkler failures are less likely than a problem affecting water delivery to the zone.
A leak elsewhere can reduce available pressure. A valve may not be opening properly. Pressure or flow conditions may have changed. The exact cause still needs investigation, but replacing individual heads one after another would be a poor way to begin.
High pressure can produce another recognizable pattern. Instead of delivering the intended droplets, several spray heads may create excessive fine mist. That mist can drift away from the target area and make irrigation less efficient.
Watching the zone as a group is often more informative than staring at the sprinkler that first caught your eye.
The Toughest Spots Are Often Along Hardscape
Sprinklers beside driveways, sidewalks, garden edges, play areas, and frequently traveled parts of the yard tend to experience more physical stress.
A mower wheel can catch a head near the edge of a lawn. People may repeatedly step beside a sprinkler along a path. Edging work can disturb surrounding soil. A sprinkler that sits slightly too high may be hit by equipment that normally passes safely over the grass.
When the same head keeps getting knocked out of position, look at how the area is actually used before replacing another part.
Sometimes the problem is elevation. Sometimes the surrounding soil does not provide enough support. In other cases, the sprinkler is simply located where regular yard activity keeps putting force on it.
Garden beds create different challenges. New mulch can partially bury small sprinklers or emitters. Plant growth can block spray. Digging, weeding, and replacing plants can move tubing or loosen risers. Knowing where the irrigation components are before working in the bed prevents a simple gardening job from creating an irrigation repair.
Before You Replace a Broken Sprinkler
Severe damage is usually easier to recognize than a slight alignment problem. Water may gush from the opening instead of forming a controlled spray. A nozzle may be missing. The sprinkler body can crack, or water may pour from the surrounding soil.
Turn the zone off before taking the damaged assembly apart. Allowing a broken sprinkler to continue running wastes water and can erode the soil around the connection, making the repair area harder to evaluate.
Do not assume the visible head absorbed all of the impact. A mower, vehicle, or heavy object that broke the sprinkler may also have damaged the riser or fitting underneath. Expose enough of the connection to check before installing the replacement.
Replacement parts must also match the existing system. Sprinkler heads, risers, fittings, pipe, and tubing come in different sizes and connection types. If the original component is unfamiliar, its markings or specifications can help identify what belongs there.
Plastic threaded parts need careful handling. Tightening harder is not a substitute for proper alignment. A connection that will not thread together normally may be mismatched, damaged, or misaligned.
Repairs That Can Make the Problem Worse
A quick correction can create a second problem when the cause has not been identified. A few common responses deserve extra caution:
- Forcing a leaning head upright: If the connected pipe or fitting is holding the sprinkler at an angle, pushing harder can damage the connection.
- Packing soil around an active leak: Fresh soil may temporarily stabilize the sprinkler while water continues escaping underneath.
- Raising a head too far: Extra height can expose the sprinkler to mower blades, wheels, and foot traffic.
- Increasing irrigation time to fix poor coverage: If one head is obstructed or tilted, longer runtime also increases watering everywhere else on the zone.
- Assuming every weak sprinkler is defective: Several weak heads can point toward a problem affecting the entire zone.
- Overtightening plastic fittings: Excessive force can damage threads or crack components instead of sealing them.
None of these requires advanced irrigation knowledge to avoid. The useful habit is simply to identify what moved or failed before deciding how to correct it.
Use Recurring Problems as Evidence
A sprinkler that needs attention once may have been accidentally disturbed. A sprinkler that needs the same repair every month is giving you information.
Crooked after mowing: Check whether the head sits too high or is exposed to mower traffic.
Loose after heavy rain or irrigation: Inspect the surrounding soil and look for signs of leakage.
Moves when someone steps nearby: The assembly may need better physical support, or its location may be vulnerable to regular foot traffic.
Keeps sinking slowly: Look at soil settlement and changes in finished grade rather than repeatedly raising the head without investigating.
Becomes unstable only while the zone is running: Watch for water escaping below grade or movement at a connection.
Several heads weaken at the same time: Look at the zone rather than assuming several individual sprinklers failed together.
The timing of a problem can be as useful as the symptom itself. A quick note or photo after each repair can help reveal a pattern that was easy to miss when each incident seemed unrelated.
Test the Repair Before Covering Everything
A sprinkler can look straight with the irrigation off and still behave badly once water reaches it.
After repositioning, repairing, or replacing a component, run the zone while the repair is still accessible. Watch whether the head rises normally and remains upright. Look at the spray direction and check the connection for leaking or movement.
Do not evaluate only the first few seconds. Let the zone run long enough to see whether water begins collecting around the repair.
When the irrigation shuts off, inspect the soil again. A slow leak may leave a wet patch even when there was no obvious spray while the system was operating.
If you excavated around the sprinkler, testing before completely restoring the soil saves time if another adjustment is needed. Once the operation looks normal, restore the ground without moving the alignment you just established.
Give the System Five Minutes of Your Attention
Many sprinkler problems stay hidden because automatic irrigation often runs early in the morning or while nobody is outside. The controller can operate perfectly for weeks while one head waters the sidewalk, another remains buried in grass, and a small leak slowly softens the soil around a third.
During the irrigation season, occasionally run the system when you have time to watch it. EPA WaterSense recommends regular irrigation inspection for leaks, broken or clogged heads, and other problems that affect performance.
You do not need to turn that inspection into a major maintenance project. Walk each active zone and look at four things:
- whether the heads rise and remain reasonably straight
- where the water actually lands
- whether water is appearing around a connection instead of through the sprinkler
- whether one sprinkler behaves differently from the rest of its zone
Then look over the same area after the water shuts off. Persistent pooling or an unusually wet patch can reveal something you did not notice while the sprinklers were running.
If a head is crooked again the next time you inspect the yard, resist the habit of simply pushing it upright. Watch it run first. The way it moves, leaks, or sprays will usually tell you much more than its angle alone.